_画板-1.png)
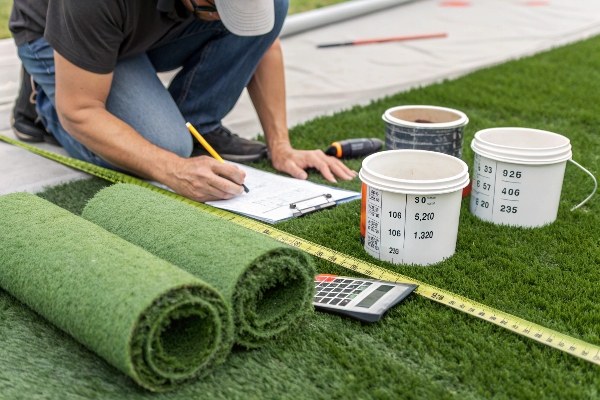
Are you worried about miscalculating the amount of adhesive for your turf project? It’s a common problem that can lead to wasted money or frustrating delays. With a simple calculation, you can get it right every time.
For a standard artificial turf installation, one 10kg portion of two-component adhesive is typically enough to cover a seam that is 25-27 meters long. This amount works perfectly for joining two standard rolls of turf, which often come in 2×25 meter or 4×25 meter sizes.
Getting the quantity right is just the start. The real success of your project depends on how you apply the adhesive and secure the turf. Let’s walk through the process step-by-step to ensure your installation is seamless, secure, and professional. It’s easier than you think, and I’m here to guide you through it.
How to Apply Artificial Grass Adhesive?
Applying turf adhesive can seem like a messy job. If you get it wrong, you end up with weak spots or visible seams that won’t last. But there is a straightforward method to ensure a strong, clean bond every time.
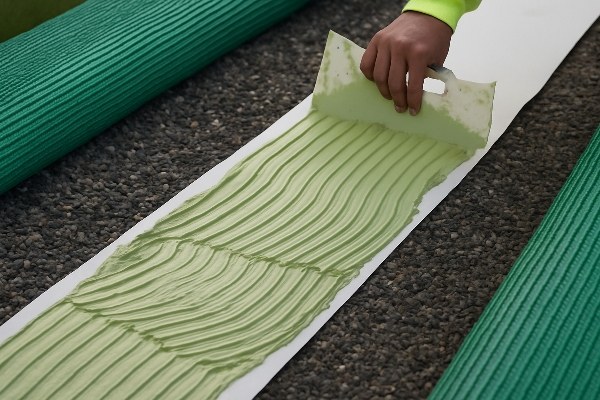
To apply artificial grass adhesive1, you first place a seam tape2 directly under the gap between two turf pieces. Then, using a trowel, spread the mixed adhesive evenly down the center of the tape before pressing the turf edges firmly into the glue.
Getting the application technique right is crucial for the longevity of your lawn. A good bond prevents seams from lifting or separating over time. Let’s go deeper into the specific steps that guarantee a professional result. Based on my experience helping countless customers, the details are what separate an average job from a great one.
Preparation is Key
Before you even open the adhesive, good preparation is essential. First, make sure the surface is clean and dry. Any dirt or moisture can weaken the bond. I always recommend doing this work when the temperature is above 10°C (50°F), as colder temperatures can affect how the adhesive cures. Once your turf rolls are laid out, double-check that the grass blades, or the pile, are all facing the same direction. This ensures the final look is uniform and natural.
The Application Process
With your turf rolls positioned correctly, fold back the edges of both pieces along the seam, exposing the backing by about 30cm on each side. Place your seam tape on the ground directly in the middle of this gap. Now, you can mix your two-component adhesive3 according to the manufacturer’s instructions. Using a notched trowel4, apply the adhesive evenly down the length of the seam tape. I’ve found that applying it in a consistent layer, not too thick or too thin, is the best way to avoid mess and ensure a solid connection.
Ensuring a Strong Bond
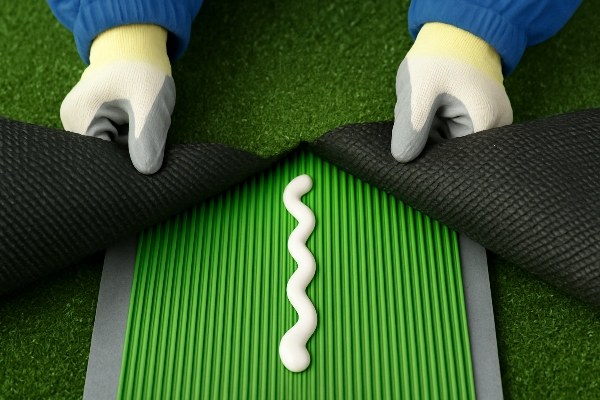
Once the adhesive is on the tape, carefully fold the edges of the turf back into place. Gently press the two pieces together, making sure the gap between them is almost invisible, ideally less than 2mm. Walk along the seam or use a roller to apply firm, even pressure. This pushes the backing into the adhesive and creates a strong, lasting bond. Make sure no grass fibers get stuck in the glue, as this can make the seam visible.
How to Join Two Pieces of Artificial Grass?
Seeing a visible line between two pieces of turf can ruin the entire look of your new lawn. This happens when the joining process isn’t done carefully, making the artificial grass look cheap. The good news is, creating a perfect, invisible seam is achievable with the right technique.
To join two pieces of artificial grass, trim the factory edges, align the pieces with a minimal gap, and bond them from below using seam tape and adhesive. Pressing the seam firmly and ruffling the grass fibers afterward will help make the join completely disappear.
The secret to a flawless installation lies in how you handle the seams. It’s a skill I’ve perfected over years in the field, and it’s the most important part of the installation process. A well-executed seam makes all the difference, creating a continuous, natural-looking surface. Let’s break down how you can achieve this professional finish yourself.
Trim for a Perfect Fit
Standard rolls of artificial grass come with a "factory edge," which is a strip of bare backing material on the sides. Before you can join two pieces, you must trim this edge off. I use a sharp utility knife and a straight edge for this. You want to cut as close to the first line of stitched grass tufts as possible without cutting into them. This creates a clean, straight edge that is essential for a tight seam. Do this for both pieces you intend to join.
The Seaming Technique
After trimming, position the two pieces next to each other on your prepared sub-base. Make sure the pile direction is consistent across both rolls. The goal is to get the edges as close as possible without them touching or overlapping. A tiny gap, about the thickness of a credit card, is ideal. Once you’re happy with the placement, fold the edges back and lay your seam tape on the sub-base, centered under the join line. Apply your adhesive to the tape, then carefully press both turf edges back down and onto the glue.
Hiding the Evidence
With the pieces glued down, walk along the seam to ensure the backing makes solid contact with the adhesive. I always finish by ruffling the grass fibers along the seam with my hands. This little trick helps the blades from both sides mix together naturally, effectively hiding the join line. Give the adhesive enough time to cure according to the instructions before allowing heavy traffic on the area.
How Many Nails Do I Need for Artificial Turf?
You’ve laid your turf and the seams look great, but now the edges are starting to lift. This is not only an eyesore but also a potential trip hazard. To prevent this, you must secure the perimeter of your installation properly.
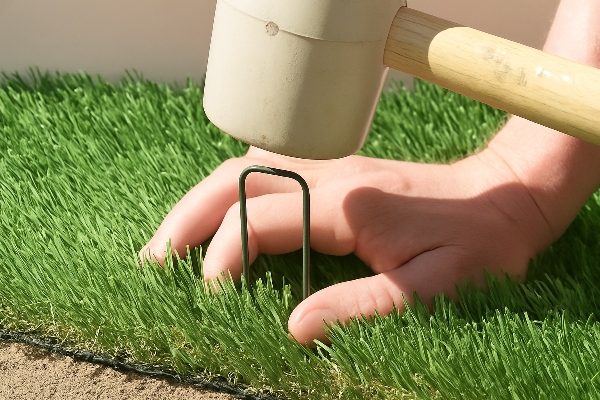
You need to place a galvanized nail every 20-50cm (about 8-20 inches) around the entire perimeter of the artificial turf to secure it. This ensures the edges stay flat and prevents the turf from shifting or lifting over time.
Securing the edges is the final, crucial step in any artificial turf installation. It’s what gives the project a clean, professional finish and ensures its durability against weather and foot traffic. Too few nails and your turf will move; too many is just a waste. Let’s dive deeper into the best practices for nailing that I’ve shared with my customers for years.
Why Nailing is Essential
Nailing the perimeter does more than just hold the turf down. It prevents the edges from curling up due to temperature changes and stops the entire lawn from shifting or developing wrinkles over time. In my experience, properly secured edges are a hallmark of a high-quality installation. It’s a simple step that protects your investment and keeps your lawn looking perfect for years to come. It also provides a neat, tidy finish where the turf meets a hardscape, like a patio or walkway.
Choosing the Right Nails
The type of nail you use matters. I always recommend using 4 to 6-inch non-corrosive or galvanized nails. The length ensures they anchor firmly into the sub-base material below the turf. The galvanized coating is critical because it prevents the nails from rusting. Rusty nails can break down over time and leave unsightly brown stains on your beautiful green turf. Don’t try to save a few cents here; using the right nails will save you headaches later.
The Best Nailing Technique
To install the nails, start at one corner and work your way around the entire perimeter, placing a nail every 20-50cm. The key to making the nails invisible is to part the grass fibers with your fingers before hammering. You want the head of the nail to go through the backing material and sit flat against it, not on top of the grass blades. Once the nail is hammered down securely, simply fluff the fibers back over the nail head. It will completely disappear, leaving you with a securely fastened and flawless-looking lawn.
Conclusion
Properly installing artificial turf comes down to a few key details. By accurately calculating your adhesive, mastering the seaming process, and securely nailing the perimeter, you ensure a durable and professional-looking result that you can be proud of.
-
Explore this link to find top-rated adhesives that ensure a durable and long-lasting bond for your artificial grass. ↩
-
Learn about the proper use of seam tape to achieve seamless and professional-looking artificial grass installations. ↩
-
Discover the benefits and application methods of two-component adhesives for various projects, including turf installation. ↩
-
Find out how using a notched trowel can improve your adhesive application and ensure a strong bond. ↩
_画板-1.png)