_画板-1.png)
You buy premium artificial grass, and you expect a flat, perfect surface. But sometimes you unroll it, and you see waves, bumps, or ugly wrinkles. This looks unprofessional and worries your clients.
Use sunlight and gravity to fix most issues. Unroll the turf and let it sit in the sun for a few days to relax the backing. For stubborn bumps, pile extra sand infill on the spot to weigh it down. Ensure your storage stacking is correct to prevent these problems.
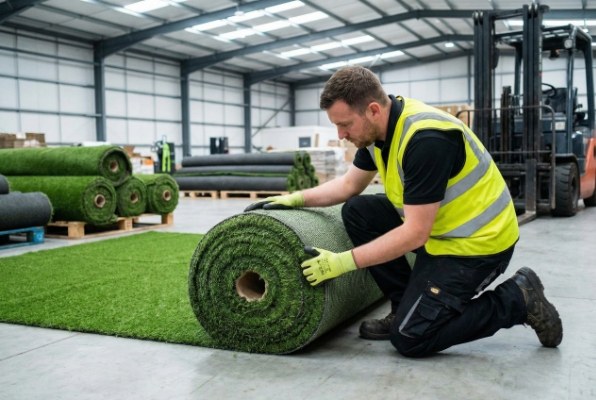
I have seen many installers panic when they see uneven usage. They think the manufacturing quality is bad. Usually, the grass is fine. It just needs time to relax or a little help. I want to share my experience on how to fix this quickly.
What Causes Bulges and Wrinkles in Artificial Turf and How Do They Affect the Project?
Delays cost money in our business. You want to install the turf and get paid, but deformities stop you. Why does the grass arrive looking like this?
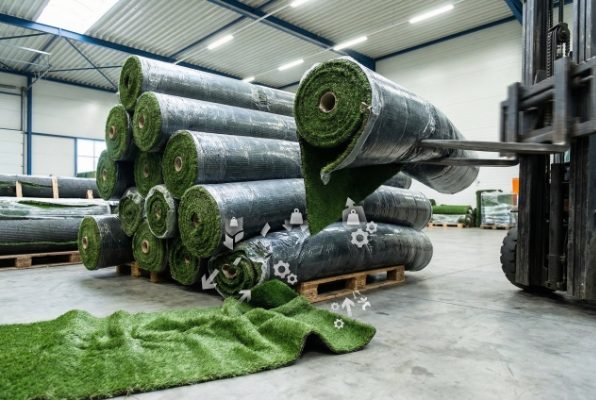
The main causes are improper storage pressure, bad winding at the factory, or careless transport. Heavy rolls stacked the wrong way create dents. These bumps create an uneven surface that is unsafe for sports and ugly for landscapes.
I have spent years in factories and warehouses. I have tracked exactly why these defects happen. It is rarely the raw material. It is almost always physical stress on the roll. If you understand the cause, you can prevent it next time.
Here is a breakdown of the specific causes I have found in my career:
| Cause | Description | Result |
|---|---|---|
| Bad Stacking | Rolls are stacked horizontally and then vertically in alternating layers (cross-stacking). | This puts uneven weight on the rolls below. It crushes the pile and dents the backing. |
| Forklift Errors | The driver lifts the roll off-center or drives too fast over bumps. | The roll center of gravity shifts. The uneven stress creates loose pockets inside the roll. |
| Loose Winding | The machine in the factory does not wind the roll tightly or keeps changing tension. | The layers slip against each other. This creates ripples right out of the factory. |
| Install Tension | You stretch the grass too much or unevenly during installation. | The backing fights back to its original shape. This creates a bulge later on. |
| Glue Issues | The seam glue is not fully dry before you move or walk on the turf. | The sheets shift. This creates a permanent wrinkle at the seam. |
| Tight Edges | The nails at the perimeter are too close or hammered too hard. | Such stress creates a "wavy edge" effect that ripples inward. |
You must check these things. If you buy from China or Vietnam, ask for photos of the loading. I always tell my team to check the winding tension. If the roll is loose, problems will happen. You need to identify these issues before you start paving.
How Can You Effectively Repair Bulges in Artificial Grass?
A bulge in the middle of a field is a nightmare. Your client will point it out immediately. You cannot hand over the project with a bump in the ground.
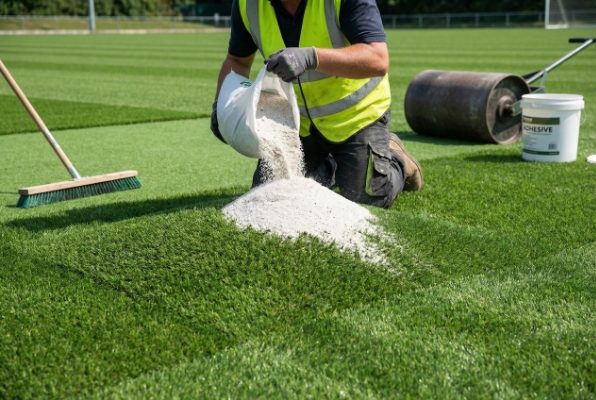
You can fix bumps by applying weight and pressure. Unroll the grass and flatten it repeatedly. If the bump remains, pile heavy infill on that specific spot to press it down. Use glue on the backing only as a final resort for permanent flatness.
Dealing with bumps requires patience. I know you want to finish the job today. But sometimes gravity takes time. Based on my experience helping customers in the US and Brazil, here are the best ways to smooth out the surface.
Method 1: The Roll and Press
First, fully unroll the turf. Do not rush this. Walk over the raised areas. Use steady steps. If the bump is stubborn, roll the turf back up partway and unroll it again. Do this several times. It helps the backing "forget" the shape it held during shipping.
Method 2: The Gravity Trick with Infill
This is my favorite trick. It saves a lot of effort.
- Identify the bumpy area.
- Pour a large amount of silica sand or rubber infill right on top of the bump.
- Make the pile higher than the surrounding area.
- Let it sit. The weight of the sand presses the backing flat against the base.
- Wait for a few hours or a day.
- Once flat, use a broom to spread that extra sand to the surrounding areas.
Method 3: The Glue Fix
Sometimes the backing is very stiff. Gravity is not enough. You must use glue.
- Lift the bumpy section.
- Apply an appropriate amount of adhesive to the clean base.
- Lay the turf back down.
- Use a heavy roller or a flat tool to press the turf firmly into the glue.
- Squeeze out any air bubbles or excess glue.
- Wait for it to solidify completely before adding regular infill.
These steps work for almost any landscape or sports project. You just need to be careful not to trap air under the glue.
What Steps Should Be Taken to Remove Wrinkles from Artificial Turf?
Wrinkles look like creases in an old shirt. They make high-quality grass look cheap. Clients feel cheated when they see lines running across their lawn.
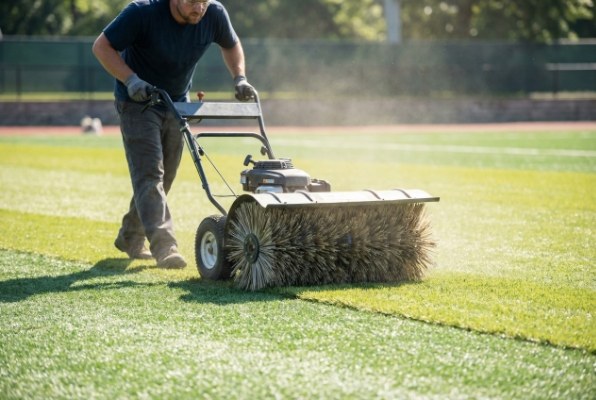
Heat is the best tool for removing wrinkles. Exposure to sunlight creates thermal expansion1 that relaxes the backing. Use a power broom2 to lift the fibers. If you combine heat and mechanical brushing, the grass will return to its original shape.
Wrinkles are different from bumps. They are often sharper creases. I often see this when rolls are bent during transport. The backing acts like memory foam. It remembers the fold. You need to reset that memory.
Here is how you handle this effectively:
1. Use the Sun
This is the most critical factor.
- Unroll the turf and ensure the backing is flat on the ground.
- Let it bake in the sun.
- Ideally, the temperature should be above 25 degrees Celsius (77 degrees Fahrenheit).
- If the sun is bright, the backing softens.
- Timeframe: High-quality yarn (high Dtex) is thick. It recovers well but might take 0.5 to 3 days to fully relax. If the yarn is thin (low Dtex), it might take even longer to stand up and smooth out.
2. Mechanical Grooming
While the grass is warm, the fibers might still point in different directions. This looks like a visual wrinkle.
- Use a turf grooming machine or a power broom.
- Pass over the wrinkled area multiple times.
- Brush against the grain.
- This action lifts the fibers and helps the heat penetrate the backing evenly.
3. Prevention During Transport
The best fix is prevention. I always tell my logistics team to be careful.
- Never fold a roll of turf.
- Do not stop halfway when unrolling.
- Do not drag the turf in a way that stretches one side more than the other.
If you are installing in a cold climate, like a foggy day in London or a winter day in Moscow, the sun won’t help. You might need to use hot water or a heat gun (very carefully) to warm the backing. But natural sunlight is always the safest method.
Conclusion
Bumps and wrinkles happen, but they are fixable. Check your shipping methods, use sunlight to relax the backing, and apply heavy infill to press down stubborn spots.
_画板-1.png)